Sunday, 23 October 2016

More right wing wing

After much discussion with the airframe guys at work on drilling perspex, I was none the wiser about using specialist bits or what speed to drill at!  I couldn't locate any suitable drill bits in the UK but importing a $3 drill from the US meant a £35 freight charge!  I therefore decided I'd have a go at grinding 1/8th and 5/32nd drills to the recommended 60 degree end with zero rake and see how it would work on a piece of scrap (an old side-screen from my MG). Behold it worked perfectly!  So I took the plunge and started on the landing light lens.

After masking the main lens area to try and minimise scratching, I match-drilled the 8 fixing holes through the wing skin and then marked the overall size of the finished lens using the plans instructions.  Drilling the holes before trimming should minimise the risk of a crack running from a hole to the edge.  Then I trimmed the excess material to within about 0.5 mm of the required size using the high speed cutting disk.  So far so good.

 The trimmed lens with edges polished and holes countersunk.  I used a coarse  sanding block initially followed by wet'n'dry paper stuck down on a flat surface and finally fine paper on a hand block.  This took about 3 hours!

 Next the screw holes in the skin are dimpled to match the countersinks in the lens.  The brackets are riveted in place and the previously installed wiring is terminated.  All wiring will be identified using heat-shrink sleeves.

 This is the view from inside the wing looking forwards, with the landing light fixed to the bracket and all wired up.  Just need to test it!

Finally the lens is installed through the front of the wing, with great care to prevent cracking.  I was fortunate that I could get behind the lamp to assist in lining up the lens with the screw holes.  I hope it doesn't have to come out in the future as there's no rear access when the wing skins are installed!

Now I can move on and complete the the top of the right wing.  I first needed to prepare the skins - file and polish all the edges to remove cutting marks etc and then prime the inside and all mating surfaces.  I also took the opportunity to prepare the walkway doubler and the wingtip lower skin.


Here I'm painting the outer surface of the right wingtip lower skin - just the tabs that will mate to the outboard wing rib and trim panels.  The inside of the skin is fully painted.

Here all of the prepared and painted main skins are lying roughly in place ready to be installed.    You may just see some of the yellow edges that'll be overlapping the adjacent skins, so need some means of keeping trapped moisture from the skin to prevent corrosion.

 Right wing inboard top skin cleco'd and ready to rivet.


 Inboard skin now riveted (excluding the walk-way area) and outboard skin ready to secure.  The leading edge can't be finished until the final middle skin is installed.

All three main upper wing skins completed and the wing-walk doubler ready to rivet.
You can see the additional wing ribs which are closely spaced to take a person's weight from the extra rows of clecos.  The leading edge along the whole wing is also cleco'd in preparation for riveting.


 The wing walk doubler completed.  Now just the leading edge of all skins to finish.


And finally all main skins completed! 

Just the wing tip now to complete for the right wing.  All the parts are ready including the fibreglass nav. light mount, so hopefully it'll be pretty straightforward.  After the wing tip is finished, I start on the flaperons.


Wednesday, 5 October 2016

Finishing the wings by the end of the first year (Not!).

At the end of my last post I had great expectations of completing both wings by the time I'd had the kit for a year.  Unfortunately it hasn't happened as planned, but I have recently managed to get back into the garage for a few hours and make some good progress on the right wing.  My repaired left knee is holding up well and I'm using a stool as much as possible.  Just worried that the right knee will go next and add another huge delay.

Anyway - a summary of recent progress.

Here's the right wing upside down on the bench showing the bottom skins being fitted.  No dramas here - just a repeat of the left wing.  It's very time-consuming to install, match-drill, remove, debur, refit and finally rivet, but doing it properly now should reduce the chance of cracks developing.  My hands ache horribly from all of the cleco installation and removal!  At least I have a pneumatic pop-rivet gun.

The last bottom skin waiting to be riveted in place.

The wing turned the right way up and the first 6 rivets aft of the leading edge now installed in each rib to create the proper profile.  There are no rivets at the inboard end yet (above the blue electrical connector) where the wing-walk doubler has to be fitted in conjunction with the top skin.

Here's a view inside the wing near the root, with the bottom skin wrapping around the leading edge.  It continues to amaze me how accurate the kit production is, such that all of the holes in ribs that I've fluted still line up with the pre-punched skins!


Now I need to install the landing light near the right wing tip.  It's much easier to do before the top wing skins are fitted (I can't figure out how you'd do it on an aircraft that's already built).  UK LAA aircraft currently aren't approved for night flying and I don't intend to fly at night even if approval is ever granted.  I'm having nav, strobe and landing lights to improve the chance of other pilots seeing and avoiding me!

The supplied template is aligned with existing rivet holes and then marked-though using a spring punch for new screws and rivets.  The lamp lens cut-out is also marked.  I'm not looking forward to cutting this out by hand!

 The punch-marked holes are drilled out #40 and then match-drilled #30 to the lens brackets.

The lens hole cut out and the lamp brackets cleco'd in place.
 
 I used a 1mm-thick cutting disc in an air-grinder for the long edges of the cut-out and then an air nibbler  for the corners.  It was then down to careful filing and finally wet/dry paper on a piece of dowel to get the final shape accurate.  I'm pretty pleased with the final result!

Here are the lamp brackets and lens retaining plates with doublers and anchor nuts and cable grommets fitted as required.

Now I need to drill the Perspex lens and then trim it to final size before everything can be assembled.  At this point I'm stuck as I need to source special drill bits for the Perspex. Using standard metal drill bits can cause the plastic to chip or crack, so not worth the risk of rushing with the wrong tools.

That's it for the moment.  Hopefully more updates later this month.


Saturday, 20 August 2016

A new milestone (well almost).

It's been a while since my last post and work has been delayed due to a knee injury which required surgery.  However I finally got back into the garage last week and was able to make significant progress on the left wing.

Initial task was to complete the left wing top skins.  

 Here's the last skin - the top centre, clecoed in place and ready to rivet.  Note that all of the leading edge skins still need final riveting - they have to wait until the last top skin has been engaged into the adjacent J-section stringers.

In this view you can see I've got alternate rivets and clecos to ensure the skin is fully aligned to the final-drilled holes.

Finally  the completed main skins including the yellow-painted walk-way doubler.  This is where you step into the cockpit and as we'll be flying before the aircraft is painted, this skin needs protection against damage.

Next we can move on to the wingtip.  There are 9 pieces that make up the wingtip structure and when assembled from flat skins, make a clever complex curve.
We start with the wing hand-hold which is necessary as this aircraft is designed with removable wings for easy storage.  The hand-hold is folded from a simple pressing and appears really weak!
The hand-hold is secured to the outboard end of the main spar with 3 rivets.

Next the top skins and outboard ribs are fitted.  The front rib needs fluting to persuade it to follow the inward and downward curves of the front tip skin.
 Looking up at the forward tip rib.

Another view of the forward rib showing more of the awkward curve created by fluting and notching.

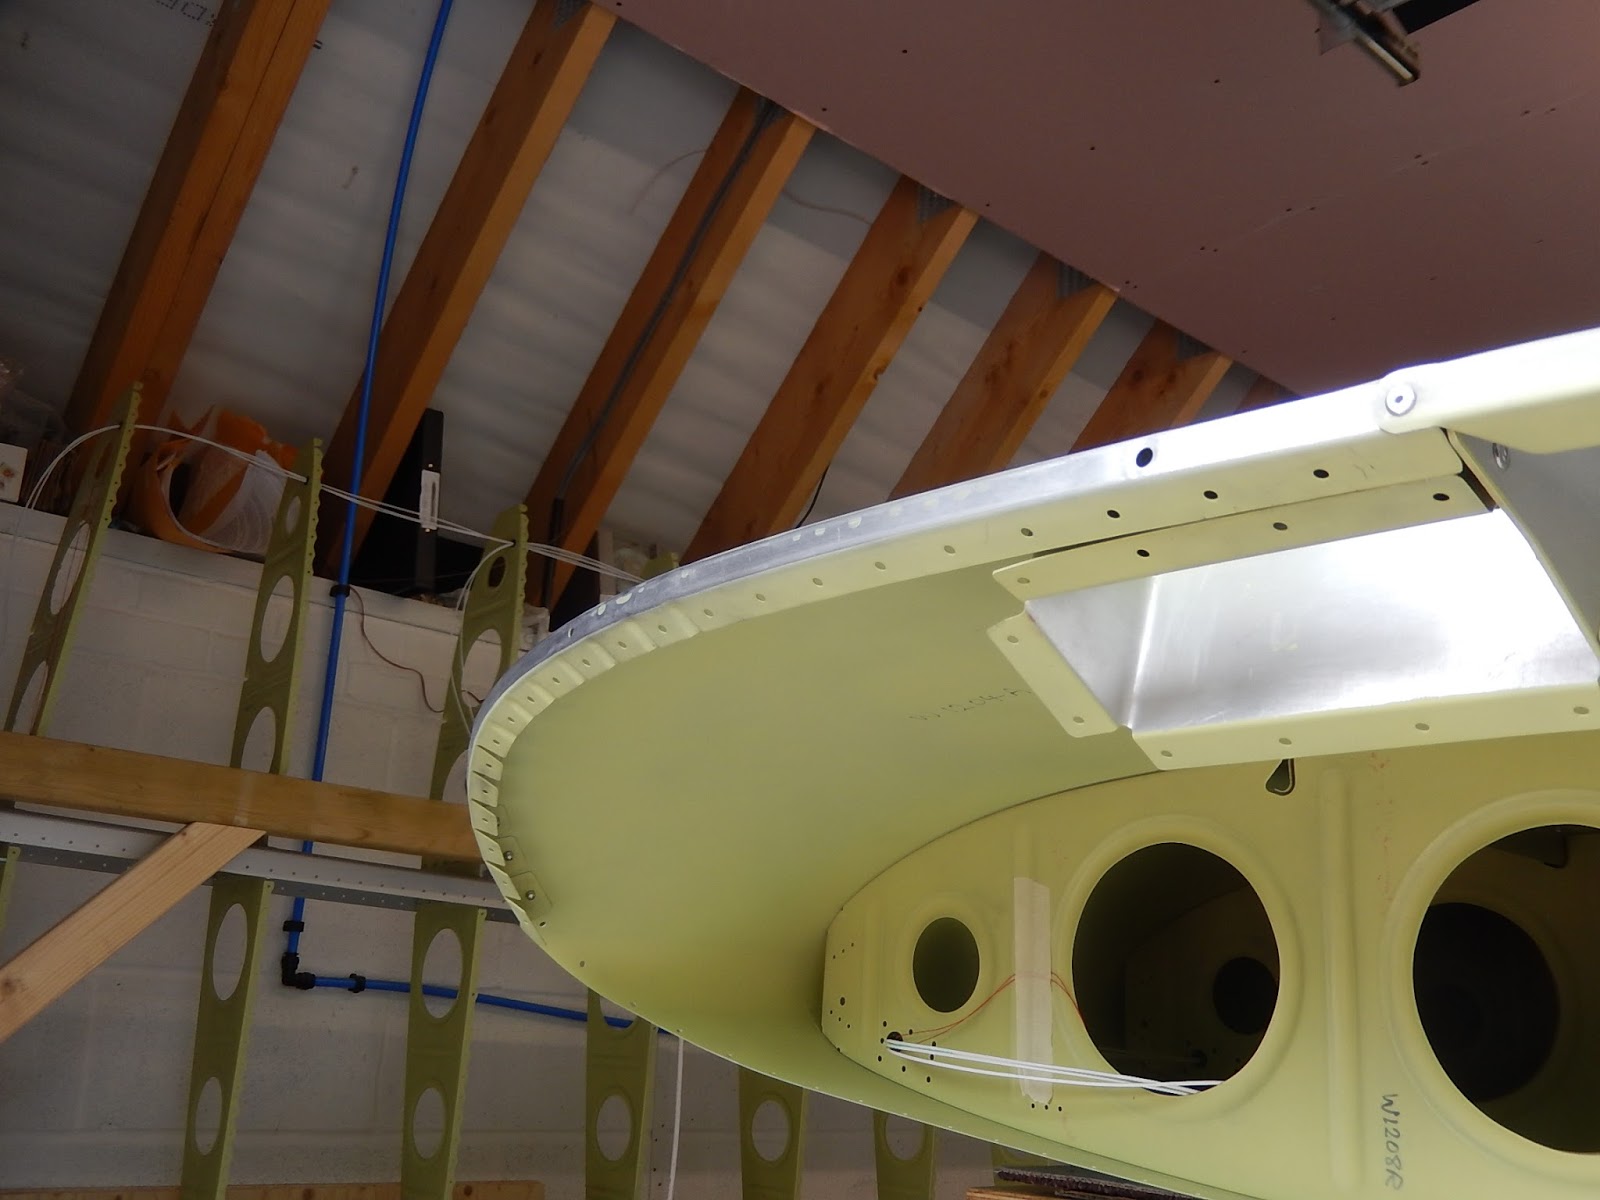
Finally comes the bottom skin.  This has loads of tabs along the inboard edge that all need bending to different angles in order to match to the inboard lower skin.  A special tool is required - made in wood to a drawing provided in the build instructions.

 In this view, I've installed the bottom skin, but have previously cut out the access aperture for installation of the wingtip strobe and nav light assembly.

This is the nav light cut-out primed prior to riveting on the fibreglass fairing.  More on that when I build the right wing as I forget to take any pictures!

Finally, the wing is returned to the modified stand so I can commence work skinning the right wing.

 I like this view as you can see both wings from the same inboard position and get an idea what's behind the skin!

In this view you can see the handhold with the trestle support sticking through.  You can also see the trailing edge extension at the tip. 

The wing has full-span flaperons - combined ailerons and flaps, and I'll be constructing and fitting these as soon as the right wing is completed.  Still to be installed is the nav light fairing.  It's all prepared but will be wet-assembled with PR1422 (fuel-tank sealant) and I only want to mix one batch, so will do this job on both wings at the same time.

That's it for the moment.  I'm now prepping the main skins for the right wing (all minor parts were done earlier with the left wing parts).  Hopefully I'll have the right wing completed as I reach the one-year mark in a few weeks.

Monday, 13 June 2016

Wing skins

Since the inspection of the wing structure back in April, things have been a bit slow.  I have however managed to prepare all of the remaining parts - wing skins (just for the left wing), stall warn switch and landing light brackets etc.  I also built a mobile wing trestle to store the wings safely when not in work. 


Wings on the mobile trestle.

 
Some of the wing small parts being prepared and primed. The main skins had to be painted in the temporary paint shop (where my car normally lives!) as they're too big to get upstairs in the garage.
 
With all parts ready, it's now it's time to start assembling again.

This is the stall warn switch on the left wing leading edge. 
 
For the non-pilot readers:  Normally, airflow approaches from the front of the vane and pushes it down.  However, if the angle of attack is too high, airflow will come from below the vane and push it up, causing the micro-switch to close and sounding a horn to make me push the aircraft nose down, thereby hopefully preventing a stall.  Although it's been adjusted now according to the build manual, final adjustments may be required after flight testing if the activation speed isn't within limits..
 
Once the remaining wiring was installed through all of the ribs for the nav and strobe lights, the wing was turned over ready for the first bottom skin to be fitted.
 

Here's the first skin in place with alternate rivets and clecos.
 
The first skin all riveted in place. 

Close-up of the lower skin reinforcing plate - a modification that came about after the first aircraft went into service.  There are 62 rivets of 4 different types holding it in place!
 
Outboard bottom skin now in place and the nav light wiring hanging out of the last rib.  The wing-tip will go where the rivet gun in standing and it's made of 3 more skins and some complex angles.    There's also some fibreglass work involved - yuk!
 
The final centre skin is now fixed in place with a view of the stall switch access panel.  The wing is now in the temporary paint shop so I can prime the section of the inboard skin where the wing-walk doubler will be installed - the piece on the trestles to the left.    It's not obvious but under the cardboard  is the top inboard skin which also requires a small section priming for the aft end of the wing-walk.  I should have dealt with these bits of painting earlier but they got overlooked.  I'll get in right on the other wing!
 
The left wing now back the right way up  and in the build area, ready to start rolling the leading edge into place. 

A view inside the centre skin bays showing the stall warn switch and its access plate.  Before I close this section I want to add an extra static pipe for a future angle-of-attack indicator.  This requires a static port rivet to be fitted on the wing bottom skin a few inches behind the leading edge.
 
The 3 bottom skins all rolled and clipped around the ribs to form the wing leading edge.  This is quite awkward to get the holes all lined-up and not crease the skins.  In the foreground you can see the blue electrical connector which allows for quick removal of the wings.   The primed outside section of skin nearest to the camera is the bit I primed earlier prior to it having the wing-walk doubler fitted. I want all mating surfaces fully primed to prevent corrosion anywhere where moisture could get trapped.
 
The last part to deal with before the wing top skins are fitted is to install the two outboard flaperon hinges.    You can perhaps imagine some of the language when trying to get the bottom corner rivet installed through the rib when the two going through the skin and rear spar were already fitted!
 
 
And finally, just to prove it doesn't always go to plan, here is where a rivet didn't quite go all the way through a rib-to-aft-spar tab .  I didn't find it until I flipped the wing after the bottom skins were fitted.  Fortunately a bit of careful drilling got it safely removed and replaced without any damage!
 
 
There will be a bit of a gap again now before I can get on with the top skins - paying work and a holiday take priority. Once back underway in mid July I think it'll be just a few days to complete this wing.


Monday, 18 April 2016

Wing inspection

So just a short update as not a lot is happening at present - too much work and other distractions!

Finishing the first wing just required the last 6 ribs to be riveted in place.  Assembling the second wing structure went really quick - less than a day and then it was ready for Jerry to come for another inspection. 


Once the two wings were finished I also brought the HS down from the loft so Jerry could see it.

The HS looks pretty small compared to a wing!

As you may have spotted above, I've also re-arranged the back of the garage so I can store the wings along the left side.  This meant moving the work-bench to the back wall, so re-plumbing the compressor and moving the pillar drill.  Next job is to build the rolling wing stand (hence the timber on the floor) and then with one wing out of the way, I can start skinning the first one.