Friday, 25 November 2016

Wing inspection and flaperons

Jerry popped down last week and my completed wings were inspected and signed off without issue, so that's a relief.  Now to move on to the flaperons.  However, before I start I need to make the garage more usable for the winter.  Last year it was far too cold so I was wrapped up like an Eskimo and had the heater running full blast and it made only a marginal difference. I decided to insulate at least the garage door which is just thin sheet steel.  I've stuck on a 25mm layer of Celotex and filled any gaps in the frame with expanding foam. The difference is pretty remarkable - the heater will actually cycle on its thermostat!  Perhaps I should try some roof insulation as well.


With the garage a bit more bearable, it's on with the flaperons. 

To start with, there is some trial assembly of the nose ribs, counterbalance weight (a four-foot length of stainless steel tube) and the outboard leading-edge skin.  This is to allow the holes in the counterbalance to be marked and match-drilled to the pre-punched holes in the leading edge skin and nose ribs.  Worried about wrecking the skin (it's only 0.015" thick) by match-drilling in-situ, I chose just to mark the holes with a spring centre-punch and then drill the holes using the pillar drill and a vee block, and this worked well.  No picture unfortunately!

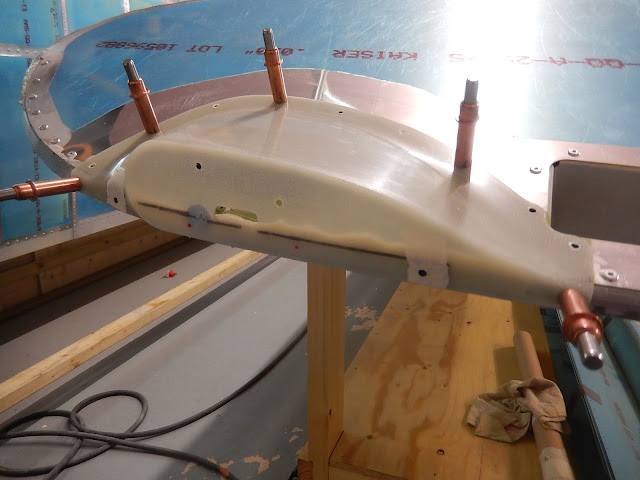
Here's the outboard end of the left flaperon temporarily assembled after match-drilling. 

A view of the same flaperon showing the inboard end of the counterbalance.

Next job is to prep the parts.  There are 24 trailing edge ribs, 2 main spars and 10 skins as well as all of the small brackets.  Time consuming is an understatement - this prep is probably the least interesting yet most labour-intensive part of building this kit. 


 4 trailing edge skins prep'd and painted.

 All of the small parts on the paint table.  You can see the counterbalance tubes hanging down from the ceiling.

One set of small parts and a section of the spar for one flaperon.

Once painting was complete I could move on with assembly.  I started by fitting all of the small brackets and nose ribs to the front face of the spars

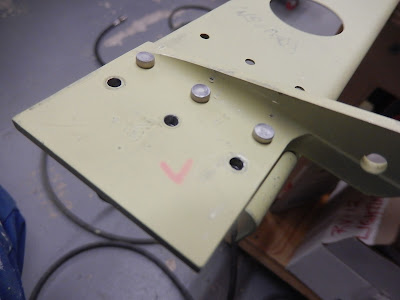
 This is the inboard end of the left flaperon.  It's very tight to get a rivet set onto the end of the solid rivets due to the machined radius in the plate and I need to tidy the paint where I've scuffed it!  The tab where the red L is marked is the interface to the moving control in the fuselage and will make the flaperon rotate around the pivot hole.   

 Another view of the inboard end with the nose rib installed and the remaining tab holes now filled as there's a trailing edge rib also fitted.  The gap between the nose rib and actuating tab is precisely 0.5" and will have the inboard of three pivot bearings installed.

This is one of the other two pivot-bearing mounts.  

 The outboard end of the completed right flaperon structure ready to be skinned.  You can see the outboard bearing bracket behind the counterbalance tube.  I finished the left one to the same stage before moving on.

 Firstly the trailing edge skins are fitted and then the outboard leading edge as shown here.

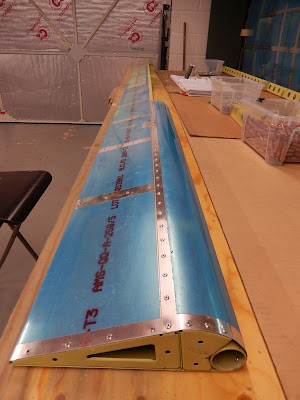
 You can get an idea of the length of the flaperon here - they are just about 11 feet long!


This is the final view of where I'm up to - the right flaperon with trailing edge skins and the outboard leading edge complete.  Actually there has been a recent change in the plans so I need some additional special rivets for the last rib hole in the trailing edge.  These can wait until until I have an order together for other parts.


Tuesday, 1 November 2016

Both wings completed.

A bit sooner than expected (nothing before has gone to plan!), I've finally completed the wings.  I do still have the flaperons to do but nevertheless it does feel like a milestone has been reached.

The outstanding items were the right wingtip structure and then completing the nav light fairings and wiring on both wings.

 I started off with the upper and lower tip skins and the hand-hold frame - very straightforward.

 Next is the aft end rib.  It's a pre-formed U-section and simple to install.

 The forward tip rib it much more awkward.  It has complex curves and a twist and needs fluting on the top and bottom edges to make it follow the correct profile.  

This is the finally formed forward tip rib installed.    In reality the fit looks like a smoother curve than in the photo.

 Now the bottom skin goes on.  Loads of small tabs along the bottom inboard edge have to be bent at different angles from 18 to 136 degrees.  In the end it worked out better than the left wing.  I cut the nav light access hole whilst the skin was still on the bench.

 A view of the completed wing-tip from the trailing edge looking forwards.

 A bit of the design that I don't really like.  There is a step in the leading edge profile where tip rib and skins don't really line up.  It is in accordance with the plans but nonetheless I'm going to smooth this section out with some epoxy/flox mix when I deal with the nav light fairings.

 This is the trimmed nav light fairing secured for match-drilling.  I failed to record any of this for the left wing!

 Another view of the cut-out to get access to the nav light wiring and the holes all drilled for the fairing attachment.  The two holes marked in red were meant to be left vacant when riveting the skin.  I still managed to put a rivet in one and had to drill it out again! I'll prime this area before fitting the fairing.

 Here the wing has been up-turned and the fairing temporarily attached with epoxy/flox mix inside, below the black line to ensure a snug fit the the outboard tip rib.  Flox is fine shredded cotton fibres that are mixed into an epoxy resin to make it stiff so it will act as a filler without running out.  The wing tip has car wax on it to act as a release agent so I can get the fairing off again.  You can see a blob of blutack through the fairing - this is to keep this area clear for a nut which secures the nav light assembly.

 Inside the fairing once the epoxy/flox mix has set.  I sanded the excess epoxy off using a rotary sander to save some weight!

 Finally, the fairing is installed and riveted.  The dark edge is the PRC between the fairing and skin (Fuel tank sealant as called out in the plans).  I really dislike PRC - it stinks, gets everywhere and is difficult to remove!  I'd previously left this stage on the left wing until I could mix one batch of sealant for both wings.   On the outside of the fairing is the mounting bracket for the nav/strobe light and the completed wiring disconnect.

Two completed wings on the stand and with the nav/strobe lights installed.  You might be able to see by the uppermost rivet where I blended-in the step in the leading edge.  Time to move onto something else after 10 months of just wings!

 A view of the completed wings from the inboard (root) end showing the electrical connectors.  The pipe sticking out of the left wing is for the angle of attack (AOA) sensor.

 Before moving on with more building, I needed to update the plans.  Loads of revisions have been issued, although fortunately none affecting anything I've done so far.    I will need to buy some improved parts to replace existing but unused bits for the fuselage.  Hopefully not too much expense but best to start with the aircraft having the most recent build standard and product improvements when it first flies.

Here's the next step - parts for the two flaperons.  Whilst these are in build, I have an inspection scheduled for the completed wings.  Hopefully nothing shows up that I've got wrong!