Jerry popped down last week and my completed wings were inspected and signed off without issue, so that's a relief. Now to move on to the flaperons. However, before I start I need to make the garage more usable for the winter. Last year it was far too cold so I was wrapped up like an Eskimo and had the heater running full blast and it made only a marginal difference. I decided to insulate at least the garage door which is just thin sheet steel. I've stuck on a 25mm layer of Celotex and filled any gaps in the frame with expanding foam. The difference is pretty remarkable - the heater will actually cycle on its thermostat! Perhaps I should try some roof insulation as well.
With the garage a bit more bearable, it's on with the flaperons.
To start with, there is some trial assembly of the nose ribs, counterbalance weight (a four-foot length of stainless steel tube) and the outboard leading-edge skin. This is to allow the holes in the counterbalance to be marked and match-drilled to the pre-punched holes in the leading edge skin and nose ribs. Worried about wrecking the skin (it's only 0.015" thick) by match-drilling in-situ, I chose just to mark the holes with a spring centre-punch and then drill the holes using the pillar drill and a vee block, and this worked well. No picture unfortunately!
Here's the outboard end of the left flaperon temporarily assembled after match-drilling.
A view of the same flaperon showing the inboard end of the counterbalance.
4 trailing edge skins prep'd and painted.
All of the small parts on the paint table. You can see the counterbalance tubes hanging down from the ceiling.
One set of small parts and a section of the spar for one flaperon.
Once painting was complete I could move on with assembly. I started by fitting all of the small brackets and nose ribs to the front face of the spars
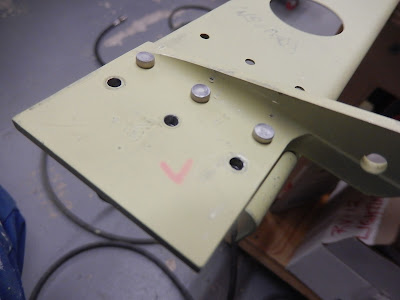
This is the inboard end of the left flaperon. It's very tight to get a rivet set onto the end of the solid rivets due to the machined radius in the plate and I need to tidy the paint where I've scuffed it! The tab where the red L is marked is the interface to the moving control in the fuselage and will make the flaperon rotate around the pivot hole.
Another view of the inboard end with the nose rib installed and the remaining tab holes now filled as there's a trailing edge rib also fitted. The gap between the nose rib and actuating tab is precisely 0.5" and will have the inboard of three pivot bearings installed.
This is one of the other two pivot-bearing mounts.
The outboard end of the completed right flaperon structure ready to be skinned. You can see the outboard bearing bracket behind the counterbalance tube. I finished the left one to the same stage before moving on.
Firstly the trailing edge skins are fitted and then the outboard leading edge as shown here.
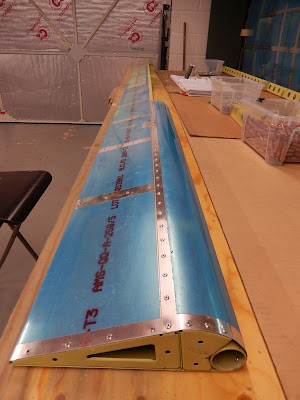
You can get an idea of the length of the flaperon here - they are just about 11 feet long!


No comments:
Post a Comment